
简介
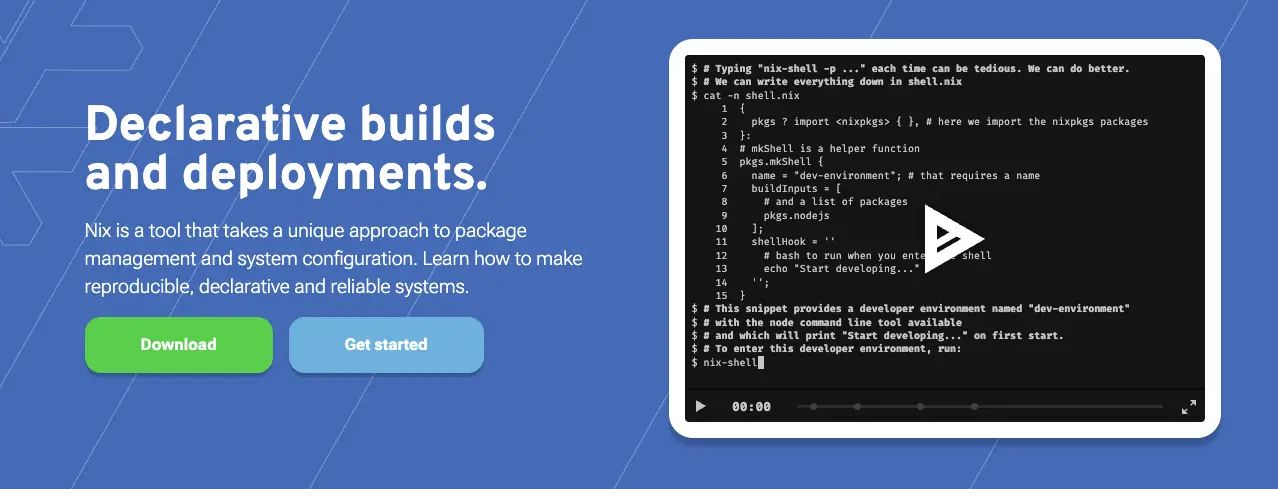
作为一个长期使用各种 Linux 发行版的开发者,我对 Ubuntu 情有独钟。然而,直到遇到 NixOS,我才真正体验到系统管理的革命性变革。NixOS 采用声明式配置管理方式,使得系统配置、软件安装和更新变得前所未有的简单和可靠。本文将详细介绍如何从零开始使用 NixOS,帮助你快速掌握这个强大的 Linux 发行版。
NixOS的核心特性
NixOS 最显著的特点是其声明式配置管理方式。通过一个统一的配置文件,你可以:
- 完整描述系统的所有配置
- 实现配置的版本控制
- 轻松复制相同的系统环境
- 支持系统配置回滚
- 确保系统配置的可重现性
这种方式不仅让系统管理变得更加可控,还大大降低了维护的复杂度。
快速入门指南
对于初次接触 NixOS 的用户,我推荐使用 Docker 来快速体验:
docker run -it nixos/nix
在开始正式使用前,强烈建议阅读以下官方教程:
系统安装
NixOS 提供了 Minimal ISO 镜像用于安装。虽然安装过程比传统 Linux 发行版略显复杂,但相比 Arch Linux 要简单得多。详细的安装指南请参考:
基础系统配置
安装完成后,我们需要创建和配置属于自己的 NixOS 系统。首先,编辑系统配置文件:
vim /etc/nixos/configuration.nix
注意:如果系统中还没有安装 vim,可以通过以下命令进入一个包含 vim 的临时 shell 环境:
nix-shell -p vim
安装完nixos之后要做的n个事情
所有的配置都需要在 /etc/nixos/configuration.nix 文件中进行。以下是一些基本配置示例:
- 设置时区:
time.timeZone = "Asia/Shanghai";
- 配置SSH服务:
services.openssh.enable = true;
services.openssh.settings = {
  "PermitRootLogin" = "yes";
};
- 配置静态IP:
networking.useDHCP = false;
networking.interfaces.ens18.useDHCP = false;
networking.interfaces.ens18.ipv4.addresses = [ {
  address = "10.10.100.99";
  prefixLength = 24;
} ];
networking.defaultGateway = "10.10.100.91";
networking.nameservers = [ "10.10.100.1" ];
networking.hostName = "bboysoul-nixos";
- 配置自定义hosts:
networking.extraHosts =''
198.18.4.181 github.com
'';
- 关闭防火墙:
networking.firewall.enable = false;
- 关闭IPv6:
networking.enableIPv6 = false;
- 安装常用软件包:
  environment.systemPackages = with pkgs; [
    vim # Do not forget to add an editor to edit configuration.nix! The Nano editor is also installed by default.
    wget
    nano
    git
    zsh
    eza
    pyenv
    starship
    yadm
    atuin
    k3s
    htop
    iftop
    iotop
    ipvsadm
    iptables
    docker
    inetutils
    docker-compose
  ];
- 配置默认shell:
users.users.root.shell = pkgs.zsh;
programs.zsh.enable = true;
- 配置Docker:
virtualisation.docker.enable = true;
virtualisation.docker.daemon.settings = {
  "data-root" = "/data/docker-data";
};
- 配置K3s:
  services.k3s.enable = true;
  services.k3s.role = "server";
  services.k3s.extraFlags = toString [
    "--cluster-init=false"
    "--docker=false"
    "--data-dir=/data/k3s"
    "--disable=traefik,servicelb,metrics-server"
    "--token=xxxxx"
    "--service-node-port-range=79-30124"
    "--kubelet-arg=cgroup-driver=systemd"
    "--kube-proxy-arg=proxy-mode=ipvs"
    "--kube-proxy-arg=ipvs-strict-arp=true"
    "--disable-cloud-controller=true"
    "--tls-san=aws.xxxxx.cn"
    "--default-local-storage-path=/data/storage"
    "--etcd-snapshot-schedule-cron=0 */5 * * *"
    "--etcd-snapshot-retention=20"
    "--etcd-snapshot-dir=/data/storage/etcd"
    "--flannel-backend=host-gw"
  ];
注意k3s中flannel如果是vxlan的话貌似会有问题ipvsadm iptables默认没有安装,需要安装下
- 配置vscode
vscode remote server在nixos中默认是不能使用的,需要结合下面这个项目
https://github.com/nix-community/nixos-vscode-server
{
  imports = [
    (fetchTarball "https://github.com/nix-community/nixos-vscode-server/tarball/master")
  ];

  services.vscode-server.enable = true;
}
完整的配置
# Edit this configuration file to define what should be installed on
# your system. Help is available in the configuration.nix(5) man page, on
# https://search.nixos.org/options and in the NixOS manual (`nixos-help`).

{ config, lib, pkgs, ... }:

{
  imports =
    [ # Include the results of the hardware scan.
      ./hardware-configuration.nix
      (fetchTarball "https://github.com/nix-community/nixos-vscode-server/tarball/master")
    ];

  # Use the GRUB 2 boot loader.
  boot.loader.grub.enable = true;
  # boot.loader.grub.efiSupport = true;
  # boot.loader.grub.efiInstallAsRemovable = true;
  # boot.loader.efi.efiSysMountPoint = "/boot/efi";
  # Define on which hard drive you want to install Grub.
  boot.loader.grub.device = "/dev/sda"; # or "nodev" for efi only
  networking.useDHCP = false;
  networking.interfaces.ens18.useDHCP = false;
  networking.interfaces.ens18.ipv4.addresses = [ {
    address = "10.10.100.99";
    prefixLength = 24;
  } ];
  networking.defaultGateway = "10.10.100.91";
  networking.nameservers = [ "10.10.100.1" ];
  networking.hostName = "bboysoul-nixos";
  networking.extraHosts =''
  198.18.4.181 github.com
  '';


  services.vscode-server.enable = true;


  # networking.hostName = "nixos"; # Define your hostname.
  # Pick only one of the below networking options.
  # networking.wireless.enable = true;  # Enables wireless support via wpa_supplicant.
  # networking.networkmanager.enable = true;  # Easiest to use and most distros use this by default.

  # Set your time zone.
  time.timeZone = "Asia/Shanghai";

  # Configure network proxy if necessary
  # networking.proxy.default = "http://user:password@proxy:port/";
  # networking.proxy.noProxy = "127.0.0.1,localhost,internal.domain";

  # Select internationalisation properties.
  # i18n.defaultLocale = "en_US.UTF-8";
  # console = {
  #   font = "Lat2-Terminus16";
  #   keyMap = "us";
  #   useXkbConfig = true; # use xkb.options in tty.
  # };

  # Enable the X11 windowing system.
  # services.xserver.enable = true;


  # Configure keymap in X11
  # services.xserver.xkb.layout = "us";
  # services.xserver.xkb.options = "eurosign:e,caps:escape";

  # Enable CUPS to print documents.
  # services.printing.enable = true;

  # Enable sound.
  # hardware.pulseaudio.enable = true;
  # OR
  # services.pipewire = {
  #   enable = true;
  #   pulse.enable = true;
  # };

  # Enable touchpad support (enabled default in most desktopManager).
  # services.libinput.enable = true;

  # Define a user account. Don't forget to set a password with ‘passwd’.
  # users.users.alice = {
  #   isNormalUser = true;
  #   extraGroups = [ "wheel" ]; # Enable ‘sudo’ for the user.
  #   packages = with pkgs; [
  #     tree
  #   ];
  # };
  users.users.root.shell = pkgs.zsh;

  # programs.firefox.enable = true;
  programs.zsh.enable = true;

  # List packages installed in system profile. To search, run:
  # $ nix search wget
  environment.systemPackages = with pkgs; [
    vim # Do not forget to add an editor to edit configuration.nix! The Nano editor is also installed by default.
    wget
    nano
    git
    zsh
    eza
    pyenv
    starship
    yadm
    atuin
    k3s
    htop
    iftop
    iotop
    ipvsadm
    iptables
    docker
    inetutils
    docker-compose
  ];

  # Some programs need SUID wrappers, can be configured further or are
  # started in user sessions.
  # programs.mtr.enable = true;
  # programs.gnupg.agent = {
  #   enable = true;
  #   enableSSHSupport = true;
  # };

  # List services that you want to enable:

  # Enable the OpenSSH daemon.
  services.openssh.enable = true;
  services.openssh.settings = {
    "PermitRootLogin" = "yes";
  };
  virtualisation.docker.enable=true;
  virtualisation.docker.daemon.settings ={
    "data-root" = "/data/docker-data";
  };
  services.k3s.enable = true;
  services.k3s.role = "server";
  services.k3s.extraFlags = toString [
    "--cluster-init=false"
    "--docker=false"
    "--data-dir=/data/k3s"
    "--disable=traefik,servicelb,metrics-server"
    "--token=xxxxxxxxxxx"
    "--service-node-port-range=79-30124"
    "--kubelet-arg=cgroup-driver=systemd"
    "--kube-proxy-arg=proxy-mode=ipvs"
    "--kube-proxy-arg=ipvs-strict-arp=true"
    "--disable-cloud-controller=true"
    "--tls-san=aws.xxxx.cn"
    "--default-local-storage-path=/data/storage"
    "--etcd-snapshot-schedule-cron=0 */5 * * *"
    "--etcd-snapshot-retention=20"
    "--etcd-snapshot-dir=/data/storage/etcd"
    "--flannel-backend=host-gw"
  ];


  # Open ports in the firewall.
  # networking.firewall.allowedTCPPorts = [ ... ];
  # networking.firewall.allowedUDPPorts = [ ... ];
  # Or disable the firewall altogether.
  networking.firewall.enable = false;
  networking.enableIPv6  = false;


  # Copy the NixOS configuration file and link it from the resulting system
  # (/run/current-system/configuration.nix). This is useful in case you
  # accidentally delete configuration.nix.
  # system.copySystemConfiguration = true;

  # This option defines the first version of NixOS you have installed on this particular machine,
  # and is used to maintain compatibility with application data (e.g. databases) created on older NixOS versions.
  #
  # Most users should NEVER change this value after the initial install, for any reason,
  # even if you've upgraded your system to a new NixOS release.
  #
  # This value does NOT affect the Nixpkgs version your packages and OS are pulled from,
  # so changing it will NOT upgrade your system - see https://nixos.org/manual/nixos/stable/#sec-upgrading for how
  # to actually do that.
  #
  # This value being lower than the current NixOS release does NOT mean your system is
  # out of date, out of support, or vulnerable.
  #
  # Do NOT change this value unless you have manually inspected all the changes it would make to your configuration,
  # and migrated your data accordingly.
  #
  # For more information, see `man configuration.nix` or https://nixos.org/manual/nixos/stable/options#opt-system.stateVersion .
  system.stateVersion = "24.11"; # Did you read the comment?

}
配置完成之后
配置完成之后使用下面命令验证一下配置
nixos-rebuild test
使用下面命令来实现配置
nixos-rebuild switch
最后
为了确保配置不会丢失,建议为/etc/nixos目录创建一个Git仓库进行版本控制。
欢迎关注我的博客www.bboy.app
Have Fun