简介
syncd是一款开源的代码部署工具,它具有简单、高效、易用等特点,可以提高团队的工作效率.
安装
首先创建一台服务器
我使用的是centos之后使用我的centos初始化脚本初始化一下
curl -O https://raw.githubusercontent.com/bboysoulcn/centos/master/centos.sh
接着就来安装这个玩意
首先安装go
下载go
wget https://dl.google.com/go/go1.11.5.linux-amd64.tar.gz
解压
tar -zxvf go1.11.5.linux-amd64.tar.gz
mv go /usr/local
添加环境变量
vim /etc/profile
在文件最后添加
export PATH=$PATH:/usr/local/go/bin
之后
source /etc/profile
go 安装完成
安装git
yum install git
安装nginx
安装依赖
yum install pcre-devel zlib-devel openssl-devel
下载nginx
wget https://nginx.org/download/nginx-1.14.2.tar.gz
解压
tar -zxvf nginx-1.14.2.tar.gz
编译安装
cd nginx-1.14.2 && ./configure --prefix=/usr/local/nginx/ && make -j 4 && make install
之后添加环境变量
vim /etc/profile
加入
export PATH=$PATH:/usr/local/nginx/sbin/
之后
source /etc/profile
使用systemed管理nginx
vim /etc/systemd/system/nginx.service
加入
[Unit]
Description=This is nginx service is Powered by bboysoul
After=syslog.target network.target remote-fs.target nss-lookup.target

[Service]
Type=forking
PIDFile=/usr/local/nginx/logs/nginx.pid
ExecStartPre=/usr/local/nginx/sbin/nginx -t
ExecStart=/usr/local/nginx/sbin/nginx
ExecReload=/usr/local/nginx/sbin/nginx -s reload
ExecStop=/usr/local/nginx/sbin/nginx -s stop

[Install]
WantedBy=multi-user.target
启动nginx
systemctl restart nginx
systemctl status nginx
部署mysql
下载
wget https://dev.mysql.com/get/Downloads/MySQL-8.0/mysql-8.0.14-1.el7.x86_64.rpm-bundle.tar
解压
tar -xvf mysql-8.0.14-1.el7.x86_64.rpm-bundle.tar
安装
yum install ./*.rpm
设置root密码,首先查看现在root密码
systemctl start mysqld
➜  ~ cat /var/log/mysqld.log
2019-01-30T09:32:42.986730Z 0 [System] [MY-013169] [Server] /usr/sbin/mysqld (mysqld 8.0.14) initializing of server in progress as process 6081
2019-01-30T09:32:49.182874Z 5 [Note] [MY-010454] [Server] A temporary password is generated for root@localhost: &%/JDroDY8KB
2019-01-30T09:32:50.263850Z 0 [System] [MY-013170] [Server] /usr/sbin/mysqld (mysqld 8.0.14) initializing of server has completed
2019-01-30T09:32:52.485123Z 0 [System] [MY-010116] [Server] /usr/sbin/mysqld (mysqld 8.0.14) starting as process 6128
2019-01-30T09:32:53.079695Z 0 [Warning] [MY-010068] [Server] CA certificate ca.pem is self signed.
2019-01-30T09:32:53.101782Z 0 [System] [MY-010931] [Server] /usr/sbin/mysqld: ready for connections. Version: '8.0.14'  socket: '/var/lib/mysql/mysql.sock'  port: 3306  MySQL Community Server - GPL.
2019-01-30T09:32:53.139743Z 0 [System] [MY-011323] [Server] X Plugin ready for connections. Socket: '/var/run/mysqld/mysqlx.sock' bind-address: '::' port: 33060
mysql_secure_installation
按照流程操作
之后重启一下mysql的服务
systemctl restart mysqld
安装syncd
首先下载二进制包
wget https://github.com/dreamans/syncd/releases/download/1.1.2/Syncd-v1.1.2-linux-amd64.tar.gz
解压
tar -zxvf Syncd-v1.1.2-linux-amd64.tar.gz
mv Syncd-v1.1.2-linux-amd64 /usr/local/syncd
导入数据库
wget https://raw.githubusercontent.com/dreamans/syncd/master/syncd.sql
➜  ~ mysql -u root -p
Enter password:
Welcome to the MySQL monitor.  Commands end with ; or \g.
Your MySQL connection id is 8
Server version: 8.0.14 MySQL Community Server - GPL

Copyright (c) 2000, 2019, Oracle and/or its affiliates. All rights reserved.

Oracle is a registered trademark of Oracle Corporation and/or its
affiliates. Other names may be trademarks of their respective
owners.

Type 'help;' or '\h' for help. Type '\c' to clear the current input statement.

mysql> create database syncd;
Query OK, 1 row affected (0.01 sec)

mysql> use syncd
Database changed
mysql> source /root/syncd.sql;
Query OK, 0 rows affected (0.03 sec)

Query OK, 0 rows affected (0.03 sec)

Query OK, 0 rows affected (0.03 sec)

Query OK, 0 rows affected (0.03 sec)

Query OK, 0 rows affected (0.02 sec)

Query OK, 0 rows affected (0.03 sec)

Query OK, 0 rows affected (0.02 sec)

Query OK, 0 rows affected (0.02 sec)

Query OK, 0 rows affected (0.04 sec)

Query OK, 1 row affected (0.01 sec)

Query OK, 0 rows affected (0.02 sec)

Query OK, 1 row affected (0.01 sec)

Query OK, 0 rows affected (0.02 sec)

mysql>
修改配置文件
vim /usr/local/syncd/etc/syncd.ini
我的配置文件就不贴了,都是中文配置起来很简单的
启动
输入下面的命令就可以启动
./bin/syncd -c ./etc/syncd.ini
➜  syncd ./bin/syncd -c ./etc/syncd.ini
                                          __
   _____   __  __   ____     _____   ____/ /
  / ___/  / / / /  / __ \   / ___/  / __  /
 (__  )  / /_/ /  / / / /  / /__   / /_/ /
/____/   \__, /  /_/ /_/   \___/   \__,_/
        /____/

Service:              syncd
Version:              1.1.0
Config Loaded:        ./etc/syncd.ini
Workspace:            /tmp/.syncd
Log:                  "/usr/local/syncd/log/syncd.log"
Database:             127.0.0.1
Mail Enable:          0
HTTP Service:         :8868
Start Running...
如果你想后台的话那就使用screen这个命令好了
之后修改nginx的配置
vim /usr/local/nginx/conf/nginx.conf
在最后的括号之前加上
include ./vhosts/*.conf;
之后添加新的配置文件
mkdir /usr/local/nginx/conf/vhosts
vim /usr/local/nginx/conf/vhosts/syncd.conf
加入
upstream syncdServer {
    server 127.0.0.1:8868 weight=1;
}
server {
    listen       8080;
    server_name  localhost; # 此处替换成你的真实域名
    access_log   /usr/local/syncd/log/syncd-nginx.log;

    location / {
        try_files $uri $uri/ /index.html;
        root /usr/local/syncd/public/; # 此处/path请替换成真实路径
        index index.html index.htm;
    }

    location ^~ /api/ {
        proxy_pass          http://syncdServer;
        proxy_set_header    X-Forwarded-Host $host:$server_port;
        proxy_set_header    X-Real-IP     $remote_addr;
        proxy_set_header    Origin        $host:$server_port;
        proxy_set_header    Referer       $host:$server_port;
    }
}
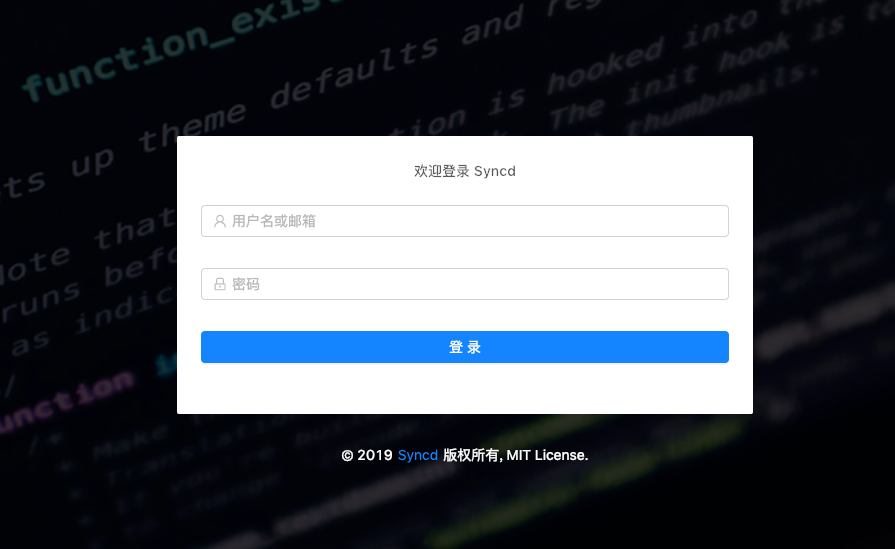
之后直接浏览器打开ip:8080就可以访问了
默认
- 用户名: syncd
- 邮箱: [email protected]
- 密码: syncd.cc

更新git
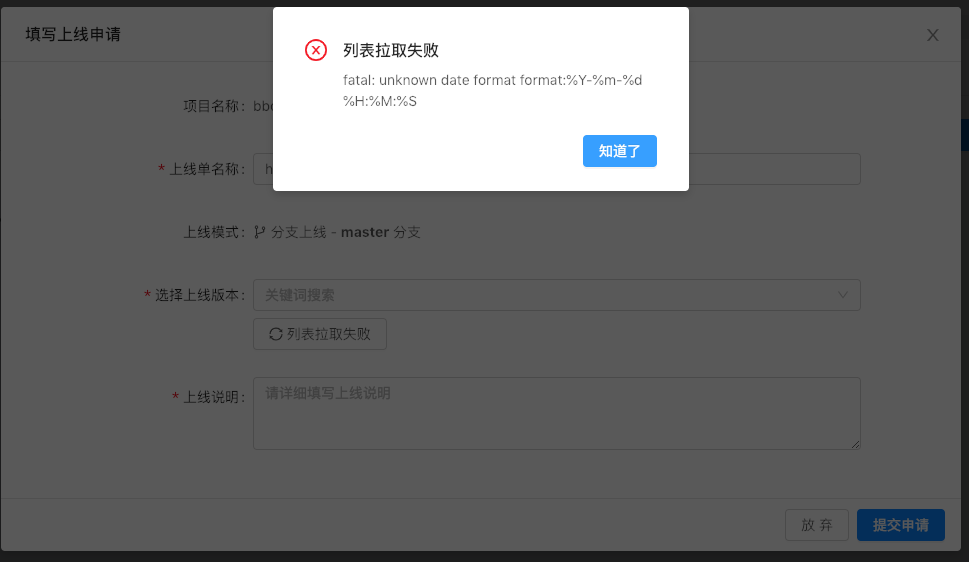
目前为止centos的官方仓库的git版本是1.8.3.1
如果使用这个版本会出现下面这个问题,这个花了我十分钟找问题原因,后来作者一秒钟就回答我原因了,是git版本太低的问题,那么就重新安装git就可以了

删除本地git
yum remove git
安装依赖
yum install curl-devel expat-devel gettext-devel openssl-devel zlib-devel
下载
wget https://github.com/git/git/archive/v2.20.1.tar.gz
解压
tar -zxvf v2.20.1.tar.gz
编译安装
cd git-2.20.1/
make all
make install
看下版本
git --version
使用
第一步我们添加一个服务器
点击集群管理->新建集群->输入集群名字
之后我们添加服务器,注意服务器和syncd这台机器要可以免密登录,我syncd这台服务器的ip是192.168.17.65要部署项目的服务器是192.168.17.96,所以要在192.168.17.65执行
ssh-keygen
ssh-copy-id [email protected]
点击服务器管理->新增服务器->输入相关信息
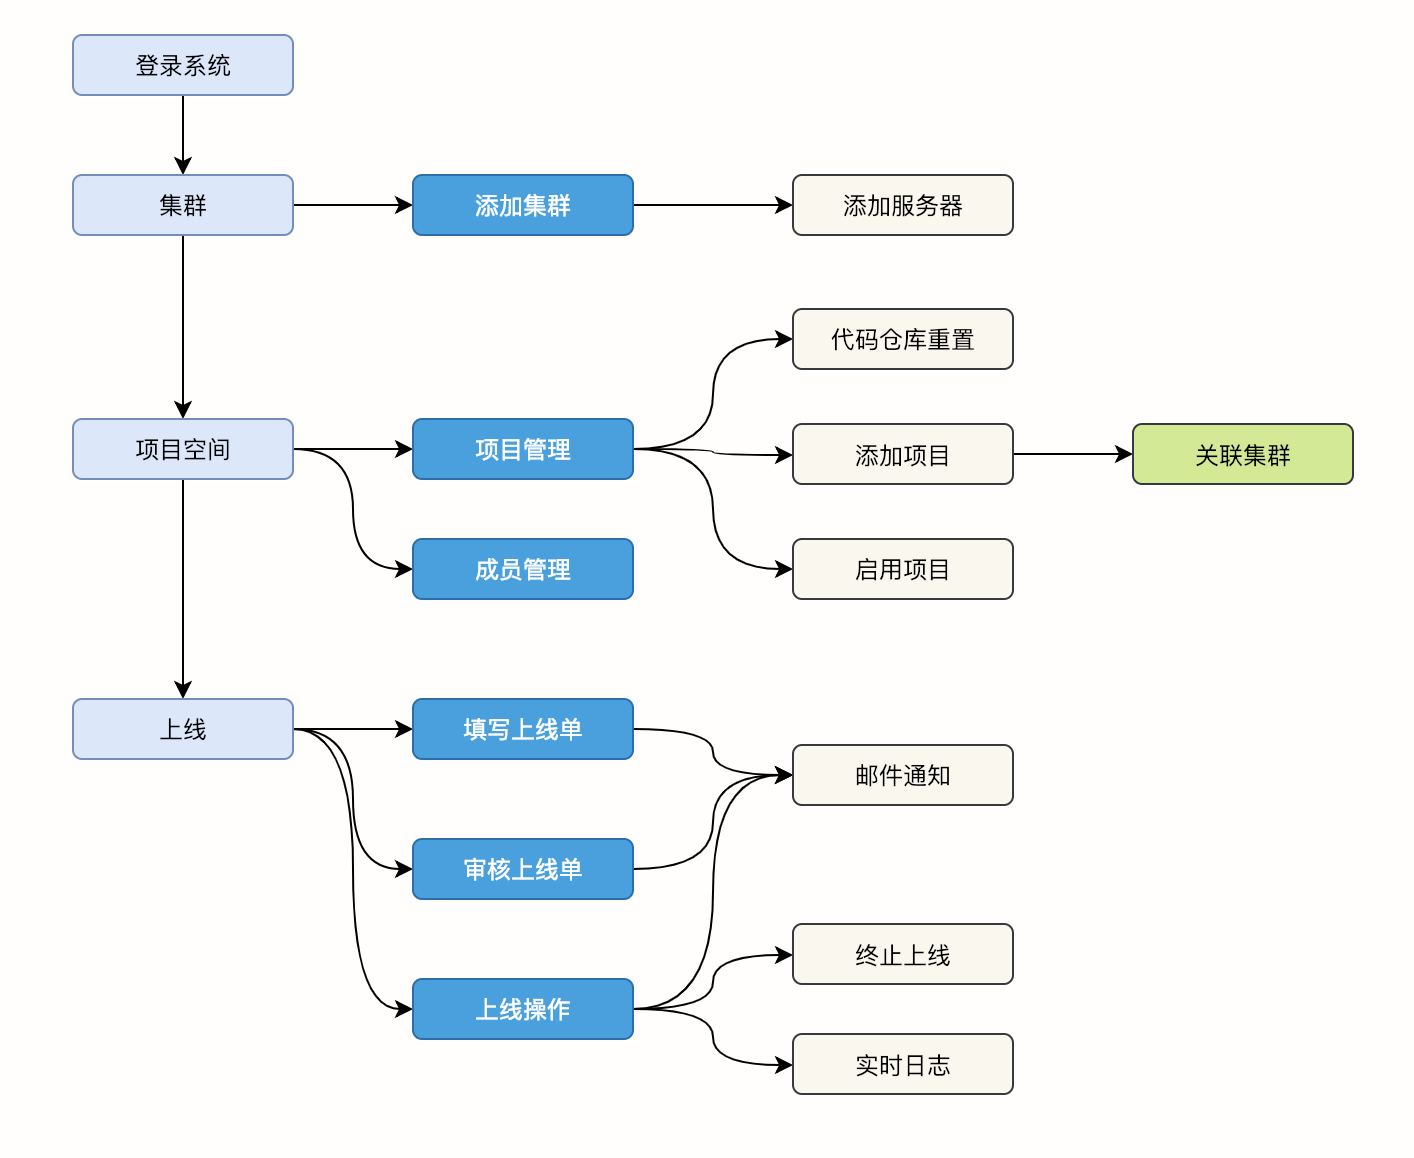
之后的步骤还是看作者的流程图吧,很简单的,如果写要一大堆,懒得写了

欢迎关注我的博客www.bboy.app
Have Fun
